Rubber Dam Isolation: Step-by-Step Tips for Fast Placement in Operative Dentistry
Master rubber dam isolation in under two minutes with practical tips on clamp selection, accurate hole punching, quadrant isolation workflows, and patient communication.
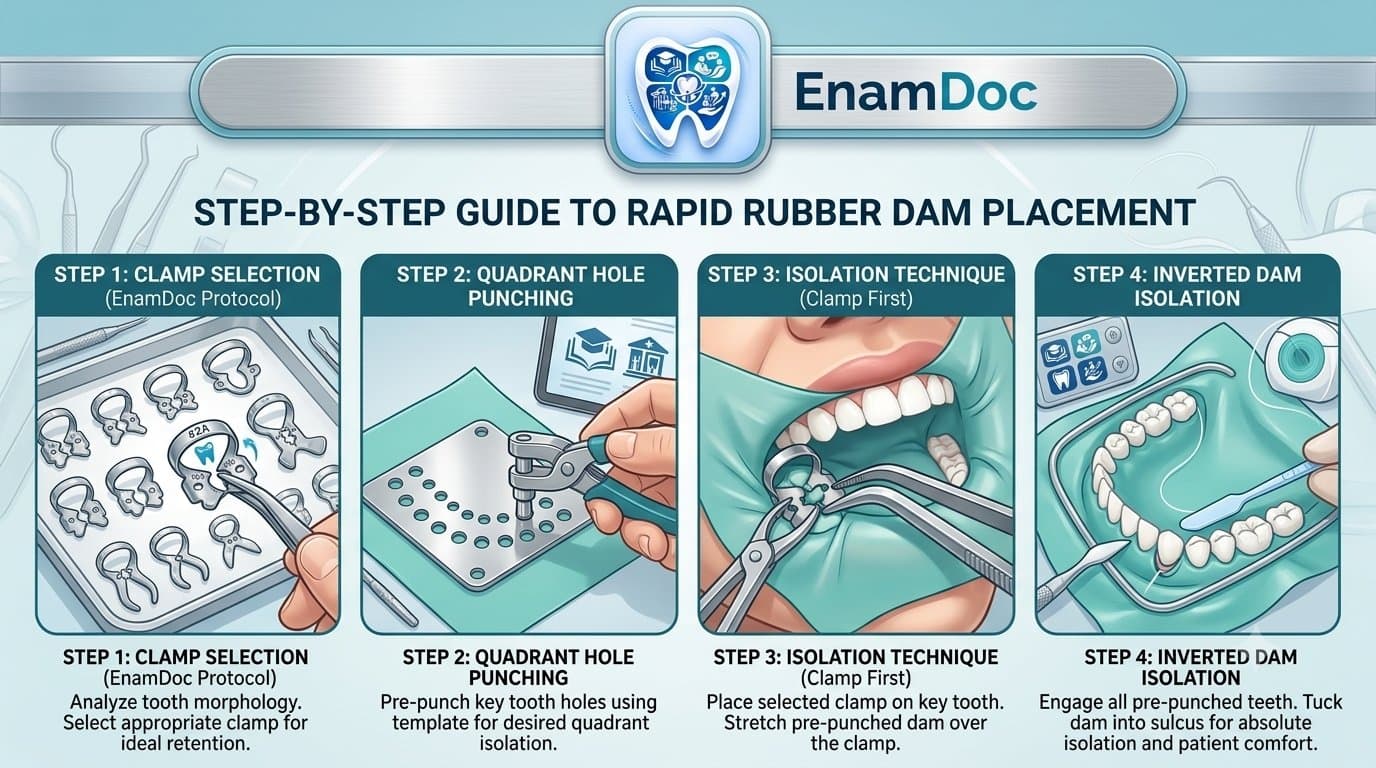
In modern restorative and endodontic dentistry, adhesive protocols demand an absolute moisture-free environment. Salivary contamination, aerosol splatter, and tongue interference can compromise bond strengths, cause microleakage, and lead to premature restoration failure. Despite being the clinical gold standard, rubber dam isolation is frequently skipped in routine practice due to a single perceived obstacle: placement takes too much chairside time.
With a standardized workflow, proper clamp selection, and efficient hole-punching habits, full quadrant rubber dam placement can consistently be accomplished in under two minutes. Here is your practical clinical blueprint to streamline isolation in operative dentistry.
1. Strategic Clamp Selection: The Foundation of Retention
Selecting the correct clamp ensures stability without traumatizing the gingival margin or snapping off under tension. A compact core kit covers over 90% of operative scenarios:
- Premolars: Winged or wingless #00, #2, #2A (flat jaws for standard premolars; subgingival jaws for partially erupted crowns).
- Maxillary Molars: #4, #8, #8A (festooned jaws contoured to fit the trifurcated cervical anatomy).
- Mandibular Molars: #7, #14, #14A (flat jaws for standard lower molars; deep-reaching serrated jaws for structurally compromised teeth).
- Anterior Teeth: Butterfly clamps like #9 or #212 (double-bowed for cervical margin retraction in Class V restorations).
- Clinical Safety Tip: Always secure dental floss to the bow of the clamp prior to placement to prevent accidental aspiration or swallowing.
2. Precision Hole Punching: Preventing Leaks and Wrinkles
Most interproximal leakage and tearing occur because of incorrect hole spacing or improper hole sizing:
- Spacing Rule of Thumb: Maintain a standard distance of 5 to 6 mm between hole edges (not hole centers). If the distance is too narrow, the septum stretches thin and saliva seeps through; if too wide, the dam bunches up interproximally and blocks vision.
- Matching Hole Sizing:
- Size 5 (Largest): Anchor/clamped molar.
- Size 4: Unclamped molars.
- Size 3: Premolars and canines.
- Size 2 & 1: Maxillary incisors and mandibular incisors, respectively.
- Sharp Punching: Inspect the punch disk regularly. Dull edges create microscopic tears that lead to complete dam ripping during floss-inversion.
3. Rapid Quadrant Placement Techniques
| Method | Step Sequence | Best Clinical Use |
|---|---|---|
| Winged (1-Step Technique) | Engage dam over clamp wings extraorally → Seat clamp and dam onto tooth together → Snap dam off wings → Attach frame. | Fastest method for standard molars and quadrant restorations. |
| Clamp First (2-Step Technique) | Seat wingless clamp directly on tooth with direct vision → Stretch hole over clamp bow and jaws → Attach frame. | Severely broken down crowns, subgingival margins, or limited visibility. |
| Dam & Frame First | Mount dam on frame extraorally → Pass through oral cavity → Seat clamp through hole. | Single-tooth endodontic isolation. |
4. Tips for Perfect Inversion and Interdental Flossing
Moisture control is incomplete until the rubber dam edges are inverted into the gingival sulcus:
- Use Water-Soluble Lubricant: Apply a small amount of water-soluble lubricant or shaving cream to the tissue-facing side of the dam. Avoid petroleum jelly, as it degrades latex and interferes with resin bonding.
- Floss-Ligature Technique: Guide the dam septum through contact points using waxed dental tape or floss in a gentle "sawing" motion. Avoid snapping through tight contacts to prevent tearing.
- Air-Drying & Inversion: Gently blast compressed air around the cervical margin while rolling the edge inward using a blunt probe or flat plastic instrument.
- Anterior Anchoring: Secure the opposite end of the quadrant using an elastic Wedjets cord or a small cut piece of rubber dam material rather than a rigid metallic clamp.
5. Overcoming Common Patient Resistance and Claustrophobia
Many patients initially fear the rubber dam because they misunderstand its purpose or feel they cannot breathe. Simple communicative reframing transforms patient cooperation:
- Reframe the Benefit: Explain that the barrier protects them from swallowing water spray and chemical irrigants: "This shield catches all the water spray so you won't have to keep swallowing or feel water pooling in the back of your throat."
- Nasal Breathing Confirmation: Remind the patient that their nose remains completely unobstructed. Before placing the frame, prompt them: "Take a normal, relaxing breath through your nose."
- Establish a Non-Verbal Signal: Agree on a clear hand gesture (e.g., raising the left hand) if they need a pause or adjustments, giving them a sense of control throughout the procedure.
The Payoff: Predictable Longevity and Faster Operative Times
While the initial learning curve takes a few practice rounds, routine rubber dam placement cuts overall procedure duration by eliminating frequent tongue retracting, mirror clearing, and cotton roll changes. More importantly, it creates the pristine, dry operative field necessary for resin adhesive restorations to last for decades.
Frequently asked
Frequently asked questions
What type of lubricant should be used on a rubber dam sheet?
Always use a water-soluble lubricant or shaving cream on the undersurface of the dam. Never use petroleum jelly (Vaseline), as it dissolves latex sheets and contaminates enamel and dentin bonding surfaces.
How can I isolate a severely broken down molar that won't hold a clamp?
Use a deep-reaching, subgingival clamp with downward festooned jaws (such as #8A or #14A), or place the clamp on the adjacent distal tooth and extend the dam isolation forward across the quadrant.
What is the best way to prevent rubber dam tears during placement?
Ensure the punch cutter disc is sharp and free of residual rubber debris to create clean circular cuts. Additionally, use waxed dental tape rather than standard floss when guiding the interdental septa through tight contacts.
- rubber dam
- operative dentistry
- dental isolation
- restorative dentistry
- endodontics
- dental clamps
- clinical efficiency
- infection control
Keep reading